Tango Foundations course, Week 2 class notes
25th January 2010
Week 1 Notes | Week 2 Notes
- Revision
- Posture and axis
- Introduction to the "embrace" (hold)
- The open embrace
- The close embrace
- Introducing pivots
- For more information
Revision
We spent some time reviewing last week's topics:
- Connecting: raising / lowering, transferring weight
- Walking: smooth, soft knees,
- Sidesteps: lower first, then lead initial move, then transfer weight
- Rocksteps: small, rotating, don't transfer the whole weight
Note: rocksteps are typically done in double-time.
Exercises
Dance, two tracks, using the steps and technique taught in the previous class.
Avoid "obstacles", both stationary and moving.
Key points
- Relax: Tensing up in dancing never helps things. Take sure, clear steps.
- Take your time: if it goes wrong, stop and re-connect
- Leaders, chest lead: don't move your arms / feet first.
- Followers, wait for the lead: if there's no lead, do nothing.
Bonus step! The curving walk
Another way of traversing corners is to pivot as part of the walk - this is how you'd walk around corners normally, basically. So you don't have to use rocksteps to turn, you can pivot as part of the walk.
Note: don't walk diagonally - pivot first, then walk straight ahead (in the new direction)
Posture and axis
We covered basic posture and axis (still in practice hold for now). There's a lot of details we could cover on posture, but for the moment, simply stand fully-upright, with your weight on the balls of your feet.
Exercises
- Try to walk, first leaning towards your partner (weight on balls of foot), and then away from your partner (weight on heels). Feel how much easier it is, when you have a forwards intention and contact with your partner.
- Dance in this posture, then stop occasionally, freeze, and look (in the mirror) at your posture to check you're still correct.
Key points
- Always keep in contact with your partner
- Ensure you have a "forwards intention" - for both leaders and followers. Don't lean back - if you do, your partner will feel off-balance as they'll have to lean forwards too much.
- Don't pull down on your partner's arms / shoulders; you shouldn't rely on your partner for support.
Think "Eiffel Tower" shape:

More
Introduction to the "embrace" (hold)
There are two types of tango "embrace" (hold): open and close.
We covered close embrace, open embrace, and moving from one to the other.
More
The open embrace
Open embrace is best if you're not comfortable dancing in close, and if you're doing a lot of pivoting-type moves.
Exercises
Dance for a while in this embrace, using all the steps you've learnt so far.
Extension: separate physically, and try to lead / follow, with no physical contact at all.
Key points
- In open embrace, followers get both tactile contact (from the arms) and visual clues (looking at the leader's chest) to understand the lead.
- Leaders, please ensure you lead from your chest. No "arm rowing".
- Similarly, leaders, don't pull or push your partner into position. Align yourself correctly, and your follower will align herself to meet you. Of course, this assumes that followers are following the chest movements...
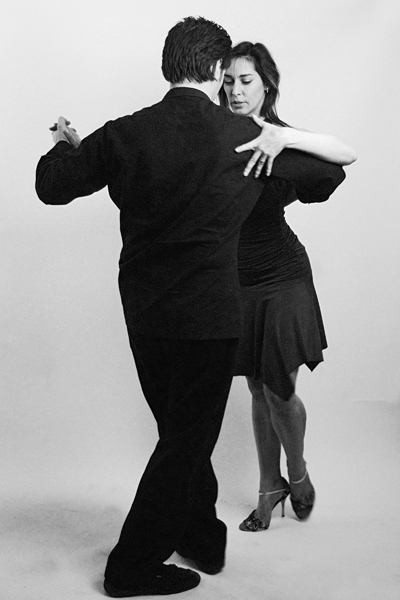
Close embrace

Description: The close embrace is like an airport hug where you are meeting someone special after a long break.
Posture is basically the same as the open embrace; fully upright, weight over balls of the feet. But you have contact with your partner along the torso. Note that it's important to have space between your legs and your partner's legs, as in the diagram.
Close embrace is best for traditional-style tango dancing, without too many pivots.
Exercises
To get into the embrace, "airport hug" your partner, then just change the arm on the open side (leader's left, follower's right).
Walk with your hands behind your back (both partners), and try to keep constant contact between you.
Extension: try doing a variety of this type of step.
Key points
- Close is close - yes, it's intimate, but if you don't press against your partner, it doesn't work.
- If you do it right, close embrace makes leading and following easier, because you have more contact - at least for the steps covered so far.
- Don't force (pull) your partner into a close embrace - he/she may not be happy with that. Invite it, don't force it.
Introducing pivots
Pivots are the final step (so to speak) in the foundations toolkit, and introduce a whole range of movements beyond the "box steps" covered so far. Pivots allow steps like ochos and giros, which will both be covered later on in the course.
We'll cover pivot-based moves in the next couple of weeks.
Exercises
In practice hold, leaders pivot the followers one way, then the other, then transfer weight and pivot the followers on the other foot - one way, then another. Just pivots, nothing else.
Lead an "inside" pivot (where the follower pivots towards you), then an "outside" pivot (where the follower pivots away from you).
Extension 1: do the same thing, but with the leaders' hands behind their backs.
Extension 2: swap roles and repeat.
Key points
- Don't "row": leaders, don't use your arms to pivot your partner, use your chest.
- Don't hesitate: Followers, if you feel yourself being pivotted, pivot. Keep heart-to-heart.
For more information
- David Bailey, 25th January 2010